

Resin Replacement Kits
Why you'll like it
- Pre-measured for your tank size
- About 15 minutes on the driveway
- Full kit first, resin only after
- Just scissors and a strip of tape
Orders ship next business day from Brisbane. Delivery times vary by location, and shipping is free on all tanks and pole kits.
International orders ship GST-free. Import duties and customs fees may apply on delivery in your country, and those charges are the responsibility of the customer.
Returns. See our returns policy for details.
Everything you need to bring your tank back to a reading of 0 ppm, in about 15 minutes on the driveway. Pre measured resin for your tank size, and the gear that gets the old resin out cleanly.
Full kit or resin only?
The gear lasts forever. You only buy it once.
Full kit First swap
The resin plus every piece of gear the job needs. Buy this the first time.
- Pre measured resin for your size
- Black extraction head, extraction tube and hose
- Filling funnel with safety cap
- Cloth collection bag
- Instruction card with a QR code
Resin only Every time after
Same resin, no gear. For anyone who already has the kit.
- Pre measured resin for your size
- Reuse your head, tube, funnel and bag
- Available for Lite, Pro and Commercial tanks, plus older Mini tanks
What comes in the full kit
-
HFR (High Flow Resin) mixed bed resinVacuum sealed 5 L bags, enough to fill your tank.
-
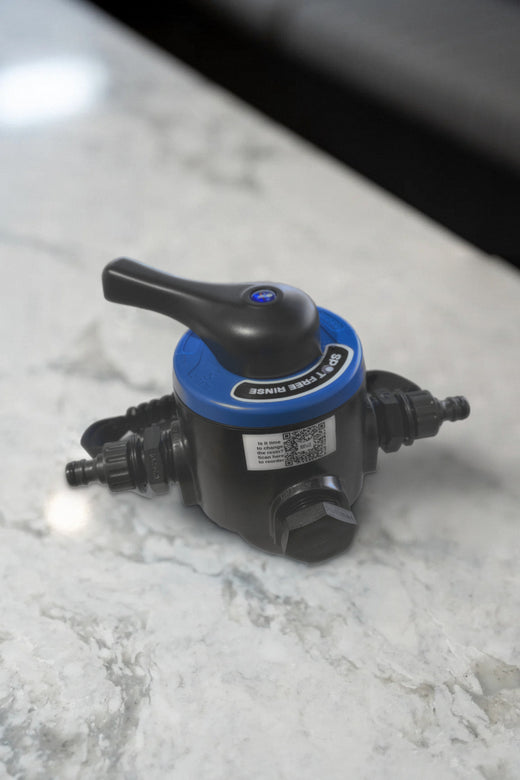
Black extraction headFilter only, with the rubber seal and no mesh, so you never flush through your own head.
-
Extraction tubeNo bottom basket, so nothing blocks the resin on its way up and out.
-
Extraction hoseRuns from the OUT fitting straight into the bag.
-
Filling funnel with safety capThe cap seals the riser tube so resin cannot drop inside it.
-
Cloth collection bagCatches the old resin and lets the water drain. Holds about 10 L.
-
Instruction card with a QR codeScan it on the driveway for the video and the written steps. Keep it in the kit for next time.
How it goes
Water pressure does the hard part. The old way was tipping the tank out, refilling it, shaking it so the water carried the beads, then doing it again and again. Messy and slow. This flushes the lot out in one go.
- Fill the tank and open it upRun water in until it comes out of OUT, then unscrew the head and lift the internals out.
- Set up for the flushPush the extraction tube into the black extraction head, screw that head onto the tank, run the hose from OUT into the cloth bag and pull the drawstring tight.
- Flush the old resin outTap on full. The old resin lifts up the tube and into the bag. Keep going until the water runs clear.
- Fill with fresh resinRiser tube and bottom basket back in, funnel on with the safety cap, cut a bag open with scissors, pour slowly and tap the tank to settle the bed.
- Put your own head back on and checkPack the extraction head away with the rest of the kit, put your own head back on until it clicks, run water for 10 seconds, then dip your TDS meter in the output.
How much resin your tank takes
| Tank | Resin | Bags in the kit |
|---|---|---|
| Lite | 10 L | 2 |
| Pro | 15 L | 3 |
| Commercial | 25 L | 5, special order |
| Mini (older tanks) | 5 L | 1 |
Have the 8 L tank? Take the Lite kit, it comes with 10 L of resin.
When to replace it
Dip the meter in the output before a wash. The reading decides, not the calendar.
Before you order
Do I need the full kit every time?
No. The extraction head, tube, hose, funnel and bag last for life, so after the first swap you only need the resin.
Why does the kit come with its own head?
So you never have to flush through your own one. Tanks sold in recent months come with the bypass head, and pushing spent resin through a bypass head can damage it. The black head in the kit is filter only, with the rubber seal and no mesh, so paired with the supplied tube the old resin runs straight out. Your own head goes back on for the rinse.
Can I use any mixed bed resin?
The tank takes standard mixed bed resin, but resins vary a lot in how they hold up at a real rinse flow rate. Our resin is chosen and tested for exactly that, which is why we supply it as a matched kit.
Do I need any tools?
Scissors to cut the resin bags open, and a strip of masking tape for the centre tube while you pour. The tape is optional but we strongly suggest it. Everything else is in the kit and the tank head unscrews by hand.
What do I do with the old resin?
Hang the bag up to drain, let it dry, then tip it into another bag and put it in the general waste. Never wash resin down a drain. Keep the cloth bag for next time.
How long will the fresh resin last?
It depends on your water and how much you rinse. Harder water depletes it faster. Our resin life guide has the figures for each tank size.

Resin Replacement Kits
Pairs well with
Each kit is matched to a Spot Free Rinse tank size, and a bypass head on the tank keeps the fresh resin for the final rinse so it lasts longer.